Lime plaster countertops use ancient methods to create a beautiful, eco-friendly alternative to toxic chemicals in the home. You can hire someone to do the job or take workshops to learn how to use lime plaster to make traditional, all-natural countertop DIY projects. The lime plaster can create a range of textures from rough and rustic to smooth or polished to look like natural stone countertops.
Civilizations worldwide have used lime plaster in construction for more than 12,000 years. Some notable examples of lime plaster in ancient architecture include the Colosseum in Rome, Notre Dame Cathedral in Paris, and the pyramids in Egypt. Lime plaster is experiencing a resurgence in popularity for its aesthetics and sustainability.
Lime plaster is an eco-friendly building material with a carbon-neutral production process and low CO2 emissions. As the plaster cures on your new countertop, it will turn back into limestone. In this process, the material absorbs carbon dioxide, which offers environmental benefits, and its high pH makes it mold-resistant. In addition, lime plaster is a durable material with a long lifespan, making it ideal for countertops.
How to make lime plaster countertops
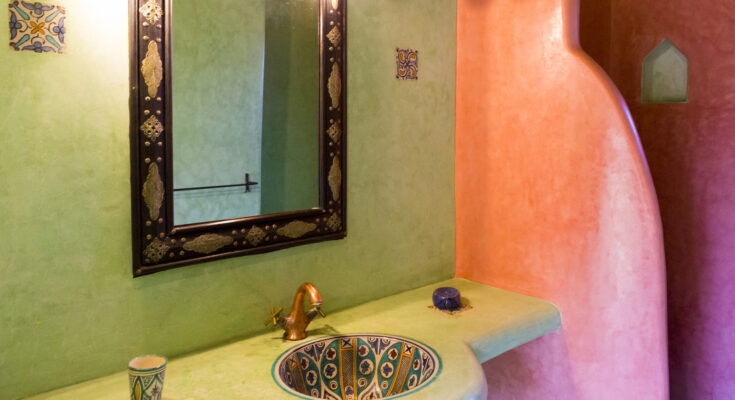
Creating a lime plaster countertop takes a little knowledge and a lot of patience. The plaster is made with lime, clay, and an aggregate, usually sand, although historically, horsehair was the secret to perfectly plastered walls. The tadelakt plastering technique is best used for wet areas, such as showers, sinks, and countertops. tadelakt is one of the newest design trends on the rise, but the technique itself is ancient.
The first step in a lime plaster countertop project is to mix the plaster. Lime plaster will naturally be an off-white color, but you can add color pigment to get the look you want. Start by applying a basecoat of lime plaster and allowing that to dry completely. Apply the next four coats in thin layers about 1/16 inch thick, smoothing and compacting each layer as you go. Allow the plaster to dry, but not fully, between coats.
The tadelakt method uses an olive oil soap sealer, which is mixed with water and applied to the countertop with a brush or roller. This traditional burnishing method uses a hard, flat, polished stone, usually granite or basalt river stones. When the first layer of sealer is done and the soap is absorbed, a second layer is applied to seal the counter and burnished into the lime plaster to create a waterproof surface on your countertop. The surface should be left to cure for five days before use.
Tips and precautions for working with lime plaster
There are a few things you should know when attempting a lime plaster traditional all-natural DIY countertop project. Lime is caustic and contact with the skin can result in burns. When mixing and applying the lime, be sure to wear gloves, safety goggles, and long sleeves to help prevent contact with your skin. When mixing the ingredients for your lime plaster countertop, mixing the ingredients in the right ratio is important to get the desired results. There are different types of lime plaster mixes, and the correct ratio will depend on your specific lime plaster. Be sure to follow the manufacturer’s recommendations.
Another important thing to know when embarking on this adventure is that creating a lime plaster countertop requires time and patience. Rushing through the process, skipping steps, or not allowing enough drying time between coats can produce lackluster or brittle results. When you take your time at each stage of the process, you will have a beautiful, durable new countertop that will resist stains and last for many years.
Looking for an easier project with a similar aesthetic? Lime plaster is different from limewash, but adding limewash to the walls around your countertop creates a beautiful, aged finish that will bring the room together. If you decide do this, you’ll need to be aware of some mistakes to avoid when you DIY a limewashed wall.