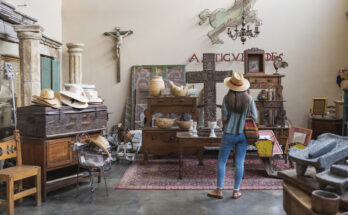
Make A Dollar Tree DIY That Does Double Duty As A Solar Light And Plant Stand
Solar-powered lights are a great option for an outdoor space. They typically work by converting light from the sun into energy, storing the energy, and then, when it is dark enough, automatically using the stored energy to power the light. This makes them a great low-maintenance light source for any yard, as you do not have to frequently change batteries, check cords, or even remember to power them on or off. Unfortunately, the simple design that many of these lights have can be the wrong style or just look a bit boring with the rest of your decor. If you want to spice up a solar light and turn it into a beautiful and functional piece for your space, then this DIY project idea is perfect for you. Using Dollar Tree materials, transform a solar light into a combination light fixture and plant stand. Then, decorate the project until you get your desired result. The final product will be a chic and functional light that you will love.
For this DIY, you need some surprising materials. First, grab three black plastic broomstick handles and two coated round wire baskets from Dollar Tree. If you already have some solar lights, then this is one of many creative ways to repurpose solar lights into beautiful home and garden décor. If not, then you can grab one a solar cylinder stake light at Dollar Tree along with some black floral garden wire. Additionally, you need a black wire wheel, a smaller wire basket, hot glue, super glue, tape, and zip ties.
How to make this DIY lamp and plant stand
Once you have all of your materials, you can begin to assemble your project. First, have someone help you hold the wheel round and the broomstick handles together to get an idea of the shape you want. Placing the wheel lower will make the handles more vertical, and moving the wheel up will make the handles less vertical and make your completed project shorter. When you are happy with the height, mark a line at the same height on each of the three broomstick handles to ensure that the wheel shelf will be level. Wrap the wire around the handle and wire wheel to secure them together, and reinforce the hold with super glue. Tape the top of your handles together to form a cone shape and secure with more wire.
Next, carefully remove the bottom of the solar light and connect the bottom of it to the bottom of your smaller wire basket, sandwiching one of the larger wire baskets between so the larger basket will act like a cage around the light. You can use zip ties, the garden wire, glue, or a combination to achieve this. Then, complete the light cage by connecting the last wire basket to the first one with the garden wire. Finally, glue the light to the stand. Once everything is dry, your project is ready for use. Set a lightweight plant on the lower shelf and place the fixture in a place that receives ample daylight for both your plant and solar light, and enjoy.
Ideas for customizing and styling this combination lamp and plant stand
While you can purchase all of the materials in black and simply put them together, there are many ways to customize the project to better suit your style. For example, spray painting the whole project is a great way to make it match your surrounding décor. Varying the materials can also make a big difference in both the look and durability. Finding some matching wooden broomstick handles or wood in a similar shape can make your stand a bit sturdier and give it more of a rustic look that may also help it last longer for anyone planning to use the light outdoors. If durability is a concern, you will be glad to know that Dollar Tree solar lights can last longer with one simple step: replacing the rechargeable batteries. Also, gently washing the solar panels every few months can keep them working well.
This finished project works well indoors near a bright window, but it can also go outside with some precautions. Primarily, If you want to place this DIY project outside, make sure to bring it in during bad or cold weather to protect it. The overall fixture can be pretty lightweight, depending on the plant and pot you put on the lower shelf, and you do not want it to be blown over by wind or a storm. Now that you have a start on your gorgeous light, check out some more budget-friendly patio lighting ideas that work no matter what your style is to get the well-lit patio of your dreams.